Saturday, March 05, 2011

World's easiest berry tart


I love this recipe from The Domestic Goddess (some say Queen of GastroPorn), Nigella Lawson.

She called it a black and white tart as she used blackberries and whitecurrants. But really, you can substitute it easily as I did. I prefer the drama of raspberries!

Whatever you put on it, it's fantastic looking, fabulous tasting, and - get this - there is NO baking involved. I kid you not.

Ingredients

250g digestive biscuits
75g unsalted butter (melted)

Filling and topping

A large egg, separated
75g caster sugar
500g masarpone
Squeeze of lime or lemon (to taste)
A tspb tequila or white rum, optional
500g berries (blackberries, white currents, blueberries, whatever you fancy really)

First, break the digestive biscuits roughly and plop them in the food processor. Blitz and then with the motor running add the melted butter down the funnel.


Transfer the mix onto a flan pan and using your fingers, press down to create the base.


Let the base set in the fridge while you prep the rest of the ingredients. First, whisk the egg white until stiff but not dry and set aside.


Next, beat the yolk with the sugar til thick and pale. Add the mascarpone to the sugar-egg mix and mix til smooth, then add the rum and lime/lemon (I used dark rum and a healthy whack of lemon to great effect).


Fold in the egg white and then smooth the mixture onto the flan pan.


Then, simply plop the berries on top and viola, it is done!


Told you it's incredibly easy!

Saturday, February 05, 2011

Singapore Airlines boleh

On a recent flight from Singapore to London, I purchased a traditional bak chang at Terminal 3 at Changi Airport.

Visions of security dogs at Heathrow airport sniffing out my beloved dumpling (terror!) combined with visions of airline food (double terror!) led me to dig my makan treasure out of my carry-on bag when it came time for lunch on the flight.

Sheepishly fishing the bak chang out of the small ugly plastic bag, I was ready to be pelted with sugar packs. The food cart came up the aisle and the crew took an odd look at my army-approved camouflage food.

Sympathetic smiles and approving nods broke out.

"Oh, Kim Choo! Good choice,'' said one kebaya-clad Singapore Girl (she had the outfit, she must be Peranakan and know her grub).

I was stunned. After a moment's hesitation, I mustered up my courage and asked: "Is there any way I could have this heated up?" (insert furious batting of non-existent eyelashes)

"Let me see what I can do," said the air stewardess, vanishing into the world beyond called First Class. I braced myself for the pilot to stop the plane mid-air and return with a fine and order to eat the assigned chicken or fish.

A few minutes later, my bak chang came back steaming hot and fragrant - complete with its own tray and proper cutlery. I was in heaven.

To make my flight even more memorable, the chief steward came back with Chinese tea to complement my simple yet totally satisfying meal.

We chatted about the upcoming Chinese New Year, how hard it was to find good bak chang in London, and he asked me what I was going to have for breakfast (Answer: The pineapple tarts stashed away in my bag).

This is it. No more airline food for me.

Singapore Airlines, you ARE a great way to fly.


Sunday, December 26, 2010

Baked Cauliflower and Broccoli Cannelloni

Merry Christmas, folks!

We got back from Egypt and totally escaped the travel nightmares that have plagued Europe, so we thought we ought to celebrate Christmas with a bang (not to mention a few Euromillions tickets).

Since we were making a pork roast and roasted potatoes, I thought we'd push the boat out with a pasta dish as well.

This is the second time I'm making this baked cauliflower and broccoli cannelloni, adapting Jamie Oliver's recipe:

500g broccoli
500g cauliflower
Olive oil
7 cloves garlic, finely slice
1 small bunch of thyme
25g anchovies in oil
Black pepper
2 cups passata
Red wine vinegar
500ml creme fraiche
200g Parmesan cheese, finely grated
16 cannelloni tubes
1 small bunch fresh basil, leaves picked
100-200g mozzarella cheese
Extra-virgin olive oil

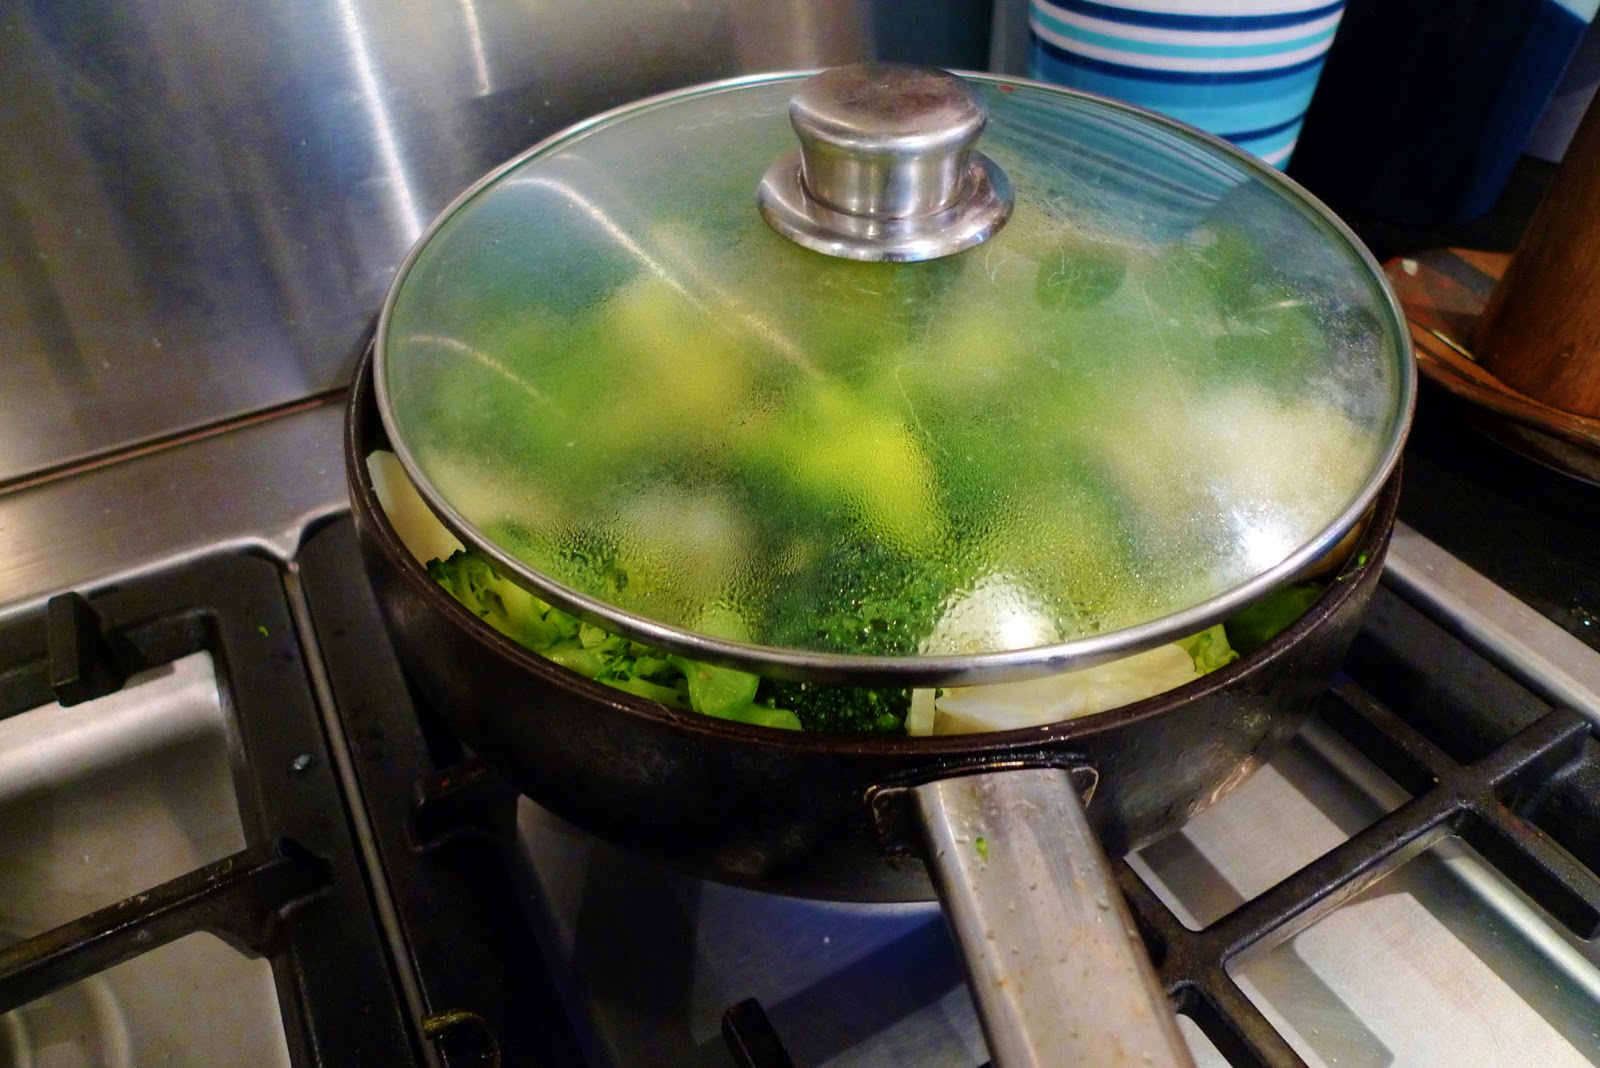
 First boil the cauliflower and broccoli in some salted water for about 5-6 minutes. 


Next, add a good glug of olive oil to a pan and fry the finely sliced garlic. Add the anchovies and thyme, give it a good mix and then add the vegetables. (The original recipe called for dried chilli but I didn't have any so did without.) Coat, add a few tablespoons of the leftover vegetable water and let it cook for about 20 minutes. Don't cover it entirely, and stir regularly.


While Jamie said to mash the vegs after they are cooked, I found it made more sense to mash it while it was cooking - it speeds up the cooking, no?


Season the vegetables and then let them cool.

Place the passata (I didn't have any so just used canned diced tomatoes, which made the hubby very happy because he prefers that anyway, plus he didn't have to go to the store on Christmas Day...) onto a baking tray (check that the tubes fit first!), add a swig of red wine vinegar, and a pinch of salt. Mix well.

Make a nice white sauce by mixing the creme fraiche, half of the grated parmesan cheese, and a touch of water. In the spirit of moderation, I used lower-fat creme fraiche. Plus running in the cold is no fun so I ain't doing it.

Now, place the cooled veg mix in a piping bag (I'd a few left over from my recent cuisine course). Twist the end, cut the tip, and let the fun begin!


Pipe the vegetables in a cannelloni tube, packing it tightly, and then place it on top of the tomatoes.
Repeat until you have a nice layer of tubes.

(Tip: I had a fair amount of leftover vegetables, even after adding two more tubes than the recipe called for. Next time I do this, I'd pipe the tubes first and see how large a baking tray they fit onto before laying out the passata. It can definitely use more than 20tubes from what I can see..)

Next, add a good sprinkling of basil - whole leaves or roughly chopped are fine.


Add a slather of the white sauce and spread it evenly.


Sprinkle the other half of the parmesan cheese on top, tear off chunks of mozzarella cheese and sprinkle on top (I only used half the amount called for).

Finally, drizzle with olive oil. Bake at 190 degC for 30-40 minutes until it's golden brown on top.


I curled up with the hubby, put a movie on and tucked in! Happy Holidays!

Tuesday, December 14, 2010

Yay

I did it.

I have my first culinary course, and passed my Basic Cuisine course. Tonight I will celebrate my pass with a lovely bottle of Tattinger and SICHUAN food :)

No carrots, butter or shallots.

Monday, November 01, 2010

Making pasta

Oris, our 14-year-old English Springer Spaniel, has been coughing alot. A few nights ago, she woke me up good at 4am. I got up to let the dogs out for a wee, could not get back to sleep, and decided to make good use of my time by...

Making pasta!


Mad I know, but hey you remember how Izzie used to bake to take her mind off things in Grey's Anatomy, right? Kneading can be very therapeutic! 


So here's what you need:


250g of '00' flour, or strong flour
2 eggs
2 egg yolks
Pinch of salt
20ml water (optional)


First, sift the flour into a metal bowl with add salt. Mix. Make a hole in the centre of the flour, and add the eggs and egg yolks.


Using your hands, start to mix the flour into the egg. Moving the bowl as you go helps! Use the water very sparingly. It's better to have a dough that's on the dry side (trust me, I am saying this from experience!)

When it is well mixed, move the dough to a clean and cool surface. Marble works best. 


Using your palm to press into the dough, knead for at least 5 minutes. (I was taking the photo with my left hand, otherwise it'd be on the dough) Add a slight dusting of flour if the dough begins to stick to the surface.

When it's got a nice elastic touch, wrap it in clingfilm and let it rest for 5 minutes, so it can rid itself of dimples. 


Once you are happy that the dough is dimple-free and of the right texture, let it rest in the refrigerator for a minimum of 25 minutes. The longer you rest it, the better - overnight is super duper!


Here's how my dough looks like after resting - see how relaxed and contented it looks? :)

So now, we are ready to call in the Pasta Maker and make some serious mee. First, roll out the dough.


Pass it through the pasta maker, starting with a greater width. Note that pasta makers usually work from 2-6, but the same number can be different width on different models (yup, that means 6 can be thickest OR thinnest depending on your machine). So play around with a small amount before you go all out.


The sad truth is that making some types of pasta is best suited for TALL people with LONG limbs, so either divide your pasta dough up and make a few more rounds, or put your spouse/lover/partner to good use and use THEIR limbs :) 


When it's nice and thin, transfer the dough to the cutter and run through. I used my knife sharpener to catch it for easy hanging and drying. 


Freshly made pasta is truly yummy, one of life's top pleasures. It's easy once you get the hang of it, so give it a try! 

Sunday, October 31, 2010

Roast beef - practice round

I used a small topside from Marks & Spencer for practice. Ideally, I should be using a sirloin.

Preheat the oven to 180degC.

Tie up your lovely roast with some twine (as you can see I was never in the Girl Guides). Season well with salt and pepper. Then, brown it in a pan on high heat. You want a happy sizzle as you put the meat down!


Place the mirepoix on a roasting pan and place the beef on top of the vegetable mix, and stick the lot in the oven for at least 20-25 mins.


Brown the potatoes in a small pan with an unhealthy amount of butter and touch of salt. Because the Hubby was out with clients at dinner, I decided to simply use the spuds I was turning for practice. We usually have A LOT more potatoes than this!


Because I'd browned the potatoes on a non-stick pan, I transferred them to a small roasting pan before letting it join the roast.


Use a meat thermometer to check on the roast when time is up. Remove and let the meat rest. Ideally, you should rest it for as long as you took to cook it (so say it was in the oven for 25 minutes, then rest it for 25 minutes). Cover partially with kitchen foil to retain the crispness.

Now, get on with making your jus. Drain the mirepoix of excess oil and place it in a small pot, along with a bouquet garni and beef stock. Bring to a boil, skimming off any oily or scummy bits. Strain it, then reduce to half. Season to taste.


For me, I was going for a rare to medium rare roast, so here's how it looked before plating:

Sunday, October 24, 2010

Homemade beef stock

Beef stock is not something I would made everyday. It is a super long process... and I don't use beef stock regularly (more chicken stock, which I make regularly). But we learnt it in school, so I decided to have a go at home.

It is best to use veal bones, but my local butcher did not get veal bones this weekend so I made do with beef bones.
 
First, brown the beef bones on the stove.


Place all the bones on a roasting pan and stick that in the oven at 230 deg C to roast for about 20 minutes.


While the bones are roasting, work on the mirepoix. Brown the vegetable mix on the stove.


Place the entire pan in the oven for about 5 minutes, replace on the stove and add mushrooms and tomato paste. Mix well.


Return to oven for about 5 minutes.

Place the bones in a huge pot, and cover with cold water.


Add the mirepoix to the pot, and add a bouquet garni. Degrease and deglaze the pan, and then add the liquid to the pot.


Skim the top of scummy bits as you bring the stock to a boil, then leave to simmer for 8 hours. Strain and viola, you have homemade beef stock.